How to Create a Stunning Gallery Wall with Nature Photography (Step-by-Step Guide)
How to Create a Stunning Gallery Wall with Nature Photography (Step-by-Step Guide)
A gallery wall transforms blank walls into captivating focal points that reflect your personality and bring life to your space. When done with authentic nature photography, a gallery wall doesn't just decorate—it creates a calming, biophilic environment that connects you to the outdoors every single day.
Whether you're working with a large living room wall or a cozy hallway, this complete guide will show you exactly how to plan, arrange, and hang a gallery wall that looks professionally designed.
Why Nature Photography Works Perfectly for Gallery Walls
Unlike abstract art or mixed media collections, nature photography creates visual harmony naturally. Here's why:
- Cohesive color palettes – Nature's colors (greens, blues, earth tones) naturally complement each other
- Varied compositions – Mix close-up macro shots with sweeping landscapes for visual interest
- Seasonal flexibility – Rotate between winter, spring, summer, and autumn collections
- Timeless appeal – Nature photography never goes out of style
- Wellness benefits – Studies show nature imagery reduces stress and improves focus. Learn how to incorporate Wall Art into Biophilic design - https://www.slaymyprint.com/blogs/magazine/how-to-incorporate-wall-art-into-biophilic-design
Step 1: Choose Your Gallery Wall Style
Grid Layout (Symmetrical)
Best for: Modern, minimalist spaces; dining rooms; offices
How it works: Arrange prints in perfect rows and columns with equal spacing
Recommended setup:
- 4-piece set (2×2 grid) – Perfect for above a sofa or bed
- 6-piece set (2×3 grid) – Ideal for larger walls
- 9-piece set (3×3 grid) – Statement wall for spacious rooms
Pro tip: Use identical frame sizes (all 12×16 or all 16×20) for a clean, cohesive look.
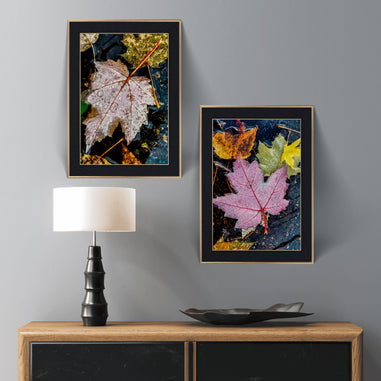
Shop this style: Winter Frozen 4-Piece Canvas Set or Kissed by Rain 6-Piece Canvas Set
Salon Style (Asymmetrical)
Best for: Eclectic, bohemian spaces; living rooms; entryways
How it works: Mix different sizes and orientations with varied spacing
Recommended setup:
- 1 large centerpiece (20×30 or 24×36)
- 2-3 medium prints (12×16 or 16×20)
- 2-4 small prints (8×10 or 9×12)
Pro tip: Start with your largest piece at eye level (57-60 inches from floor to center), then build around it.
Shop this style: - Macro Photography Prints
Linear Layout (Horizontal or Vertical)
Best for: Hallways, staircases, narrow walls
How it works: Arrange 3-5 prints in a single row (horizontal) or column (vertical)
Recommended setup:
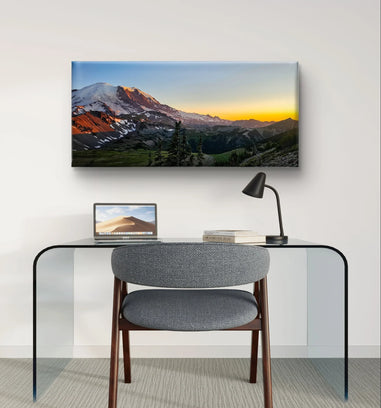
- 3-piece horizontal set – Perfect above a console table or sofa
- 5-piece vertical set – Ideal for staircase walls
Pro tip: Keep spacing consistent (2-3 inches between frames) for a polished look.
Shop this style: Kissed by Rain 3-Piece Horizontal Canvas Set
Step 2: Measure Your Wall Space
Before buying prints, measure your available wall space:
Above a Sofa:
- Gallery wall should be 2/3 the width of your sofa
- Leave 6-12 inches of space between sofa and bottom of gallery wall
- Recommended sizes: 3-piece set (total width 48-60 inches) or single large print (30×40 or 24×36)
Above a Bed:
- Gallery wall should be 2/3 to 3/4 the width of your headboard
- Leave 6-8 inches of space between headboard and bottom of gallery wall
- Recommended sizes: 2-piece set (total width 40-50 inches) or 4-piece grid
Blank Wall (No Furniture Below):
- Gallery wall can be 40-60% of wall width
- Center the arrangement at eye level (57-60 inches from floor to center)
- Recommended sizes: 6-9 piece salon wall or large single print (30×40 or larger)
Need help choosing sizes? Read our Complete Canvas Print Size Guide.
Step 3: Plan Your Layout (Before You Hang!)
The #1 mistake people make: Hanging prints without planning, then having to re-drill holes.
Easy Layout Planning Method:
- Cut paper templates – Trace each print on kraft paper or newspaper
- Tape templates to wall – Use painter's tape (won't damage paint)
- Adjust until perfect – Step back, take photos, rearrange as needed
- Mark nail positions – Mark through the paper where nails will go
- Remove templates and hang – Now you know exactly where each print goes
Pro tip: Take a photo of your final template layout before removing the paper. You'll have a reference while hanging.
Step 4: Get Your Spacing Right
Standard Gallery Wall Spacing:
- Between prints: 2-3 inches (tight, cohesive look) or 4-6 inches (airy, relaxed look)
- From ceiling: At least 6-12 inches
- From furniture: 6-12 inches
- From floor: At least 8-12 inches
Spacing by Style:
- Grid layout: Use consistent 2-3 inch spacing for a clean, modern look
- Salon layout: Vary spacing (2-6 inches) for an organic, collected-over-time feel
- Linear layout: Keep spacing identical (2-3 inches) for visual rhythm
Step 5: Choose Your Frame Style (or Go Frameless)
Framed Canvas Prints:
Pros:
- Polished, finished look
- Protects edges
- Adds dimension
Best for: Traditional, transitional, or formal spaces
Frame colors:
- Black frames – Modern, dramatic, makes colors pop
- White frames – Clean, coastal, Scandinavian vibes
- Natural wood frames – Warm, organic, complements nature photography
Shop framed options: Framed Canvas Prints Collection
Unframed Canvas Prints (Gallery Wrapped):
Pros:
- Modern, minimalist aesthetic
- More affordable
- Lightweight and easy to hang
Best for: Contemporary, bohemian, or casual spaces
Pro tip: Choose prints with wrapped edges (image continues around sides) for a seamless look.
Shop unframed options: Wrapped Canvas Prints Collection
Step 6: Hang Your Gallery Wall
Tools You'll Need:
- Measuring tape
- Level (or smartphone level app)
- Pencil
- Hammer or drill
- Picture hanging hardware (nails, screws, or adhesive hooks)
Hanging Methods:
For lightweight canvas (under 5 lbs):
- Adhesive picture hanging strips (damage-free, renter-friendly)
- Single nail or hook
For heavier canvas (5-20 lbs):
- Two D-ring hangers with wire
- Wall anchors (for drywall) or screws (for studs)
Pro tip: Always hang from two points (not one) for stability and to prevent tilting.
Gallery Wall Ideas by Room
Living Room Gallery Wall:
Style: Salon wall with mixed sizes
Theme: Seasonal nature (Winter Frozen, Autumn Leaves, Spring Blooms)
Placement: Above sofa or fireplace
Recommended products: Mt. Rainier Prints
Bedroom Gallery Wall:
Style: Symmetrical grid (2-piece or 4-piece)
Theme: Calming nature (soft blues, greens, neutrals)
Placement: Above bed
Recommended products: Calming Nature Collection
Home Office Gallery Wall:
Style: Linear horizontal (2-3-piece set)
Theme: Inspiring landscapes (mountains, forests, water)
Placement: Behind desk or on side wall
Recommended products: Mt. Rainier Collection
Hallway Gallery Wall:
Style: Linear vertical or staircase arrangement
Theme: Cohesive collection (all winter, all macro, all one location)
Placement: Along hallway or up staircase
Recommended products: Winter Frozen Collection
Dining Room Gallery Wall:
Style: Symmetrical grid (4-piece or 6-piece)
Theme: Vibrant nature (flowers, autumn colors, sunsets)
Placement: On main wall visible from table
Recommended products: Floral Photography | Autumn Collection
Gallery Wall Color Coordination Tips
Monochromatic Gallery Wall:
Stick to one color family for a cohesive, sophisticated look:
- Cool tones: Blues, greens, silvers (winter scenes, water, forests)
- Warm tones: Golds, oranges, browns (autumn leaves, sunsets, earth)
- Neutrals: Whites, grays, blacks (minimalist, modern)
Shop by color: Cool Tone Collection | Warm Tone Collection
Complementary Color Gallery Wall:
Mix colors that naturally complement each other:
- Blue + Gold (winter frost + autumn leaves)
- Green + Brown (forest + earth)
- White + Any Color (snow scenes + vibrant nature)
Pro tip: Use the 60-30-10 rule: 60% dominant color, 30% secondary color, 10% accent color.
Common Gallery Wall Mistakes (and How to Avoid Them)
❌ Hanging prints too high
✅ Solution: Center of gallery wall should be at eye level (57-60 inches from floor)
❌ Spacing prints too far apart
✅ Solution: Keep spacing between 2-6 inches for a cohesive look
❌ Choosing prints that don't relate
✅ Solution: Stick to one theme (all nature, all one season, all one location)
❌ Not planning layout first
✅ Solution: Use paper templates to plan before drilling holes
❌ Using frames that clash
✅ Solution: Stick to 1-2 frame colors maximum (or go all frameless)
Seasonal Gallery Wall Rotation
One of the best parts of nature photography gallery walls? You can rotate them seasonally!
Winter Gallery Wall:
Frosty branches, snow-covered landscapes, icy textures
Shop: Winter Frozen Collection
Spring Gallery Wall:
Fresh blooms, cherry blossoms, new growth
Shop: Spring Magic Collection
Summer Gallery Wall:
Vibrant greens, wildflowers, mountain meadows
Shop: Summer Brilliance Collection
Autumn Gallery Wall:
Golden leaves, warm earth tones, harvest colors
Shop: Festive Autumn Collection
Pro tip: Keep your frames and layout the same—just swap out the prints for instant seasonal refresh!
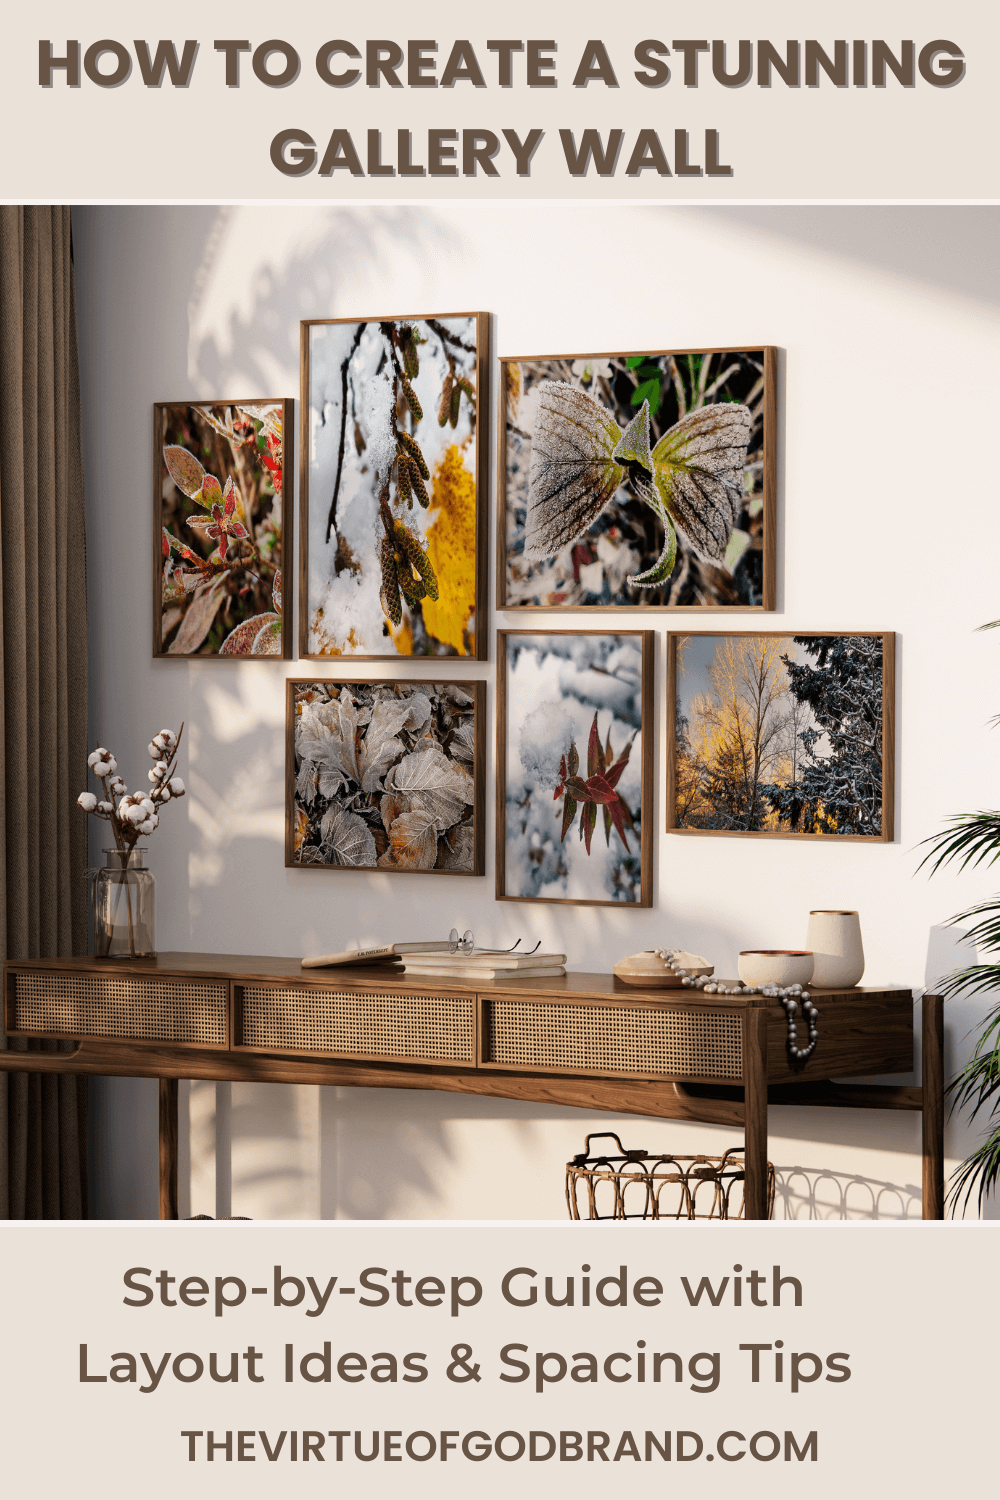
Gallery Wall Inspiration: Real Examples
Example 1: Cozy Living Room Winter Gallery Wall
Layout: 4-piece grid (2×2)
Size: Four 16×16 canvas prints
Theme: Winter Frozen collection (frosty branches, ice crystals)
Frame: Various styles of frames
Result: Modern, dramatic focal point above festive console
Shop this look: Winter Frozen 4-Piece Set
Example 2: Serene Bedroom Nature Gallery Wall
Layout: Grid vertical symmetrical
Size: three 16×32
Theme: Mixed nature (macro flowers, forest scenes, water)
Frame: Various styles of frames
Result: Calming, organic gallery wall above the couch
Shop this look: Forest Sunset Scene
Example 3: Minimalist Hallway Gallery Wall
Layout: Linear horizontal
Size: Three 30×60 canvas prints
Theme: Mt. Rainier collection (mountain landscapes)
Frame: Unframed gallery wrapped
Result: Clean, modern hallway statement
Shop this look: Sunset over Mount Rainier
Ready to Create Your Gallery Wall?
Creating a gallery wall with nature photography is one of the most rewarding DIY projects you can do. It's personal, it's beautiful, and it transforms your space instantly.
Start here:
- Choose your style (grid or linear)
- Measure your wall space
- Browse our collections and select prints that speak to you
- Plan your layout with paper templates
- Hang and enjoy!
Need help choosing? Read our Complete Canvas Print Size Guide or explore our Framed Canvas Collection for ready-to-hang sets.
Frequently Asked Questions
How many prints should be in a gallery wall?
Minimum 3 prints, maximum 15-20. Most gallery walls have 4-9 prints for balance.
What's the best size for a gallery wall above a sofa?
Total width should be 2/3 the width of your sofa. For a 72-inch sofa, aim for 48 inches total width.
Should I use frames or go frameless?
Frames add polish and protection; frameless is modern and affordable. Both work beautifully—choose based on your style.
How do I hang a gallery wall without damaging walls?
Use adhesive picture hanging strips for lightweight prints (under 5 lbs). They're renter-friendly and damage-free.
Can I mix different photography styles in one gallery wall?
Yes, but stick to a cohesive theme (all nature, all black and white, all one location) for visual harmony.
How much space should be between gallery wall prints?
2-3 inches for a tight, modern look; 4-6 inches for a relaxed, airy feel.
Ready to Create Your Stunning Gallery Wall?
Now that you have all the tools, tips, and layout ideas, it's time to bring your vision to life! A well-designed gallery wall can completely transform your space, adding personality, depth, and that professional designer touch.
Start with Our Winter Frozen Collection
Our nature photography prints are specifically designed to work beautifully together in gallery wall arrangements. Each piece captures the serene beauty of Pacific Northwest winters—frost-covered leaves, snowy landscapes, and delicate frozen details that create a calming, cohesive aesthetic.
Why Choose The Virtue of God?
✅ Authentic Nature Photography - Shot on location in Mt. Rainier, Olympic, and North Cascades National Parks
✅ Premium Canvas Quality - Museum-grade canvas with vibrant, fade-resistant inks
✅ 22 Size Options - From 5x7" to 30x60" (unframed and framed available)
✅ Gallery Wall Sets - Pre-coordinated 2, 3, and 4-piece collections
✅ Free Shipping - On all orders over $35
✅ 30-Day Returns - Love it or return it, no questions asked.
Shop Now
👉 View All Our Nature Photography
Questions? Contact us - We're here to help you create the perfect gallery wall!
Prefer Amazon? We also sell on Amazon. Visit The Virtue of God Store!
Share Your Gallery Wall! We'd love to see your creation!
Tag us on social media:
📷 **Instagram: @thevirtueofgodbrand - https://www.instagram.com/thevirtueofgodbrand/
📌 **Pinterest: The Virtue of God Nature Photography - https://www.pinterest.com/TheVirtueofGod/
📘 **Facebook: The Virtue of God - https://www.facebook.com/profile.php?id=61566677341972
Use hashtag #TheVirtueOfGodGalleryWall for a chance to be featured!
Happy decorating!